A lot of customers are still surprised that work with virtual servers by Coolhousing is the same as with any other physical server. The only exception rests in web administration that will serve the administrator as optical mechanics with an installation CD/DVD and a computer front panel, via which it is possible to turn-on, turn-off, or restart the server. Coolhousing web administration brings you that and much more.
After receiving your new ControlPanel sign-in name and password, go to https://controlpanel.coolhousing.net/ – and sign there in with your data:

After login you will see Dashboard.
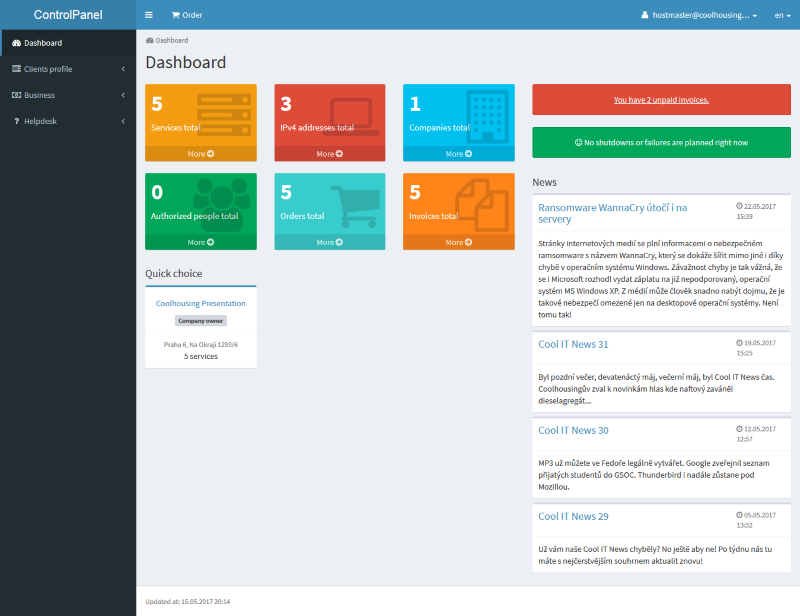
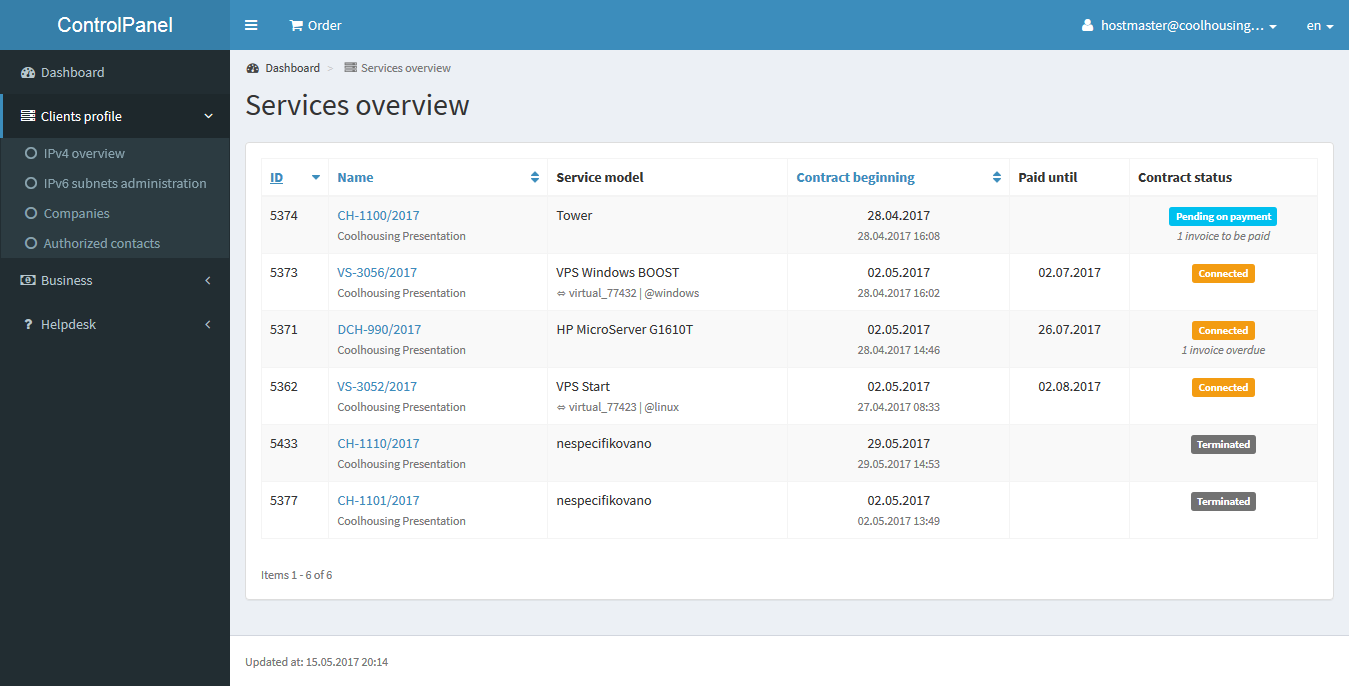
Now go to the tab Clients profile, you will see Services verview and ahead you will see all your active service.
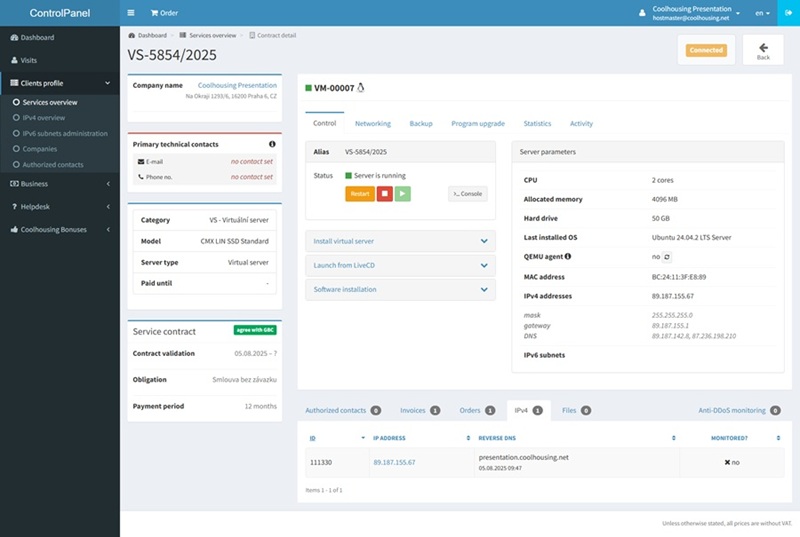
When you click on the service name, detailed information about the service will be displayed along with additional options to configure your VPS. Here you can restart, shut down, or start the server. Naturally, there’s also the option to directly reinstall the server using a wide range of supported operating systems and distributions. You can also manage your backups here. Backups are performed daily by default, but one manual backup can be created on request via this interface.
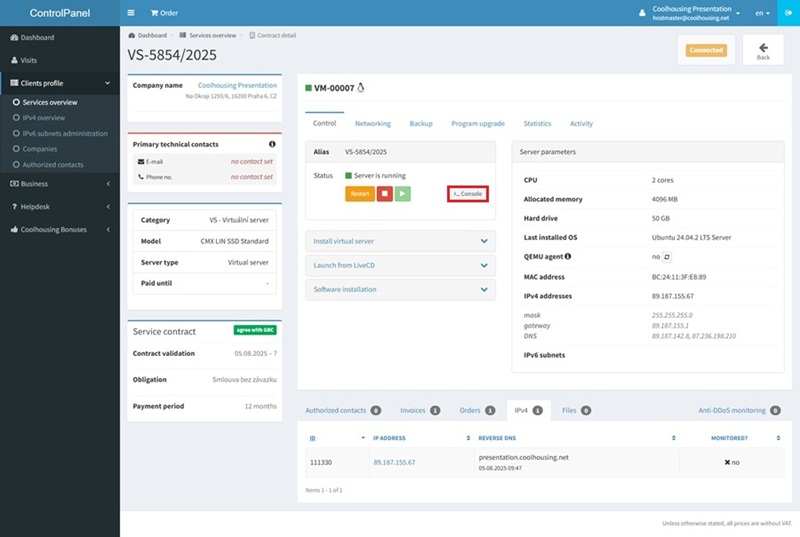
By clicking the Console button, you can access the HTML5 console for quick server management.
Sometimes, when accessing the console, you may encounter a flashing screen with the PROXMOX:
.
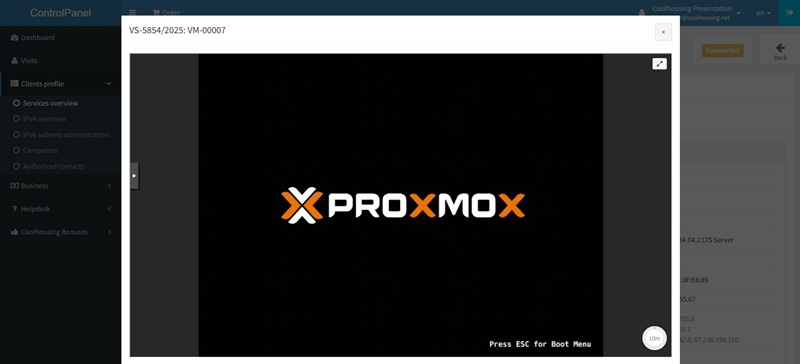
In this case, it means the server needs to be installed first. To start the installation, go to the main tab with the virtual server details, click Install virtual server, check Install from ISO image, and select one of the many preconfigured installation images. Confirm your selection by clicking Start installation.
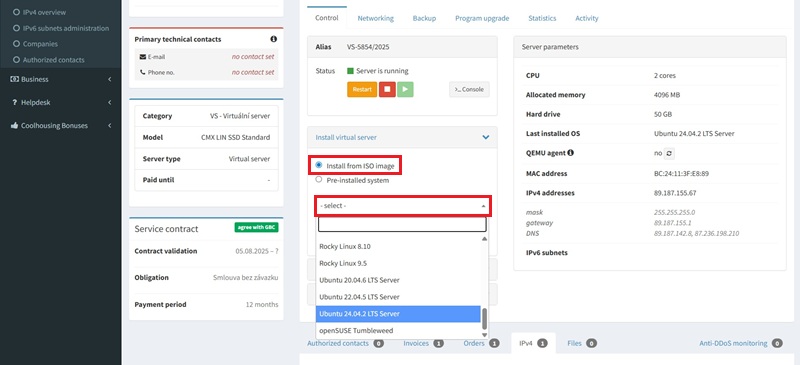
Once the button is clicked, the request is processed immediately and usually takes just a few seconds. If the virtual server has any media inserted in the virtual drive (Installation CD, LiveCD, Software CD), control options from the client interface are limited to Console, Start, Shut Down, Restart, and Eject CD.
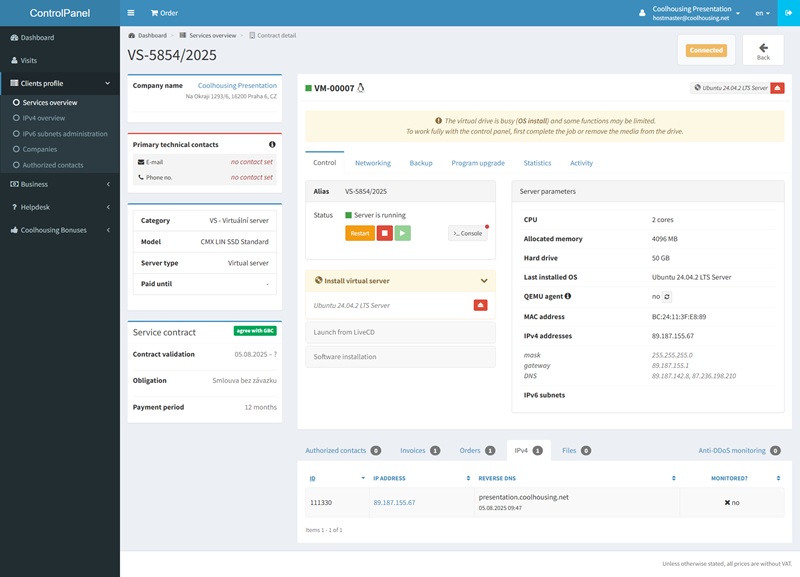
Now, simply open the server console and begin the installation process.
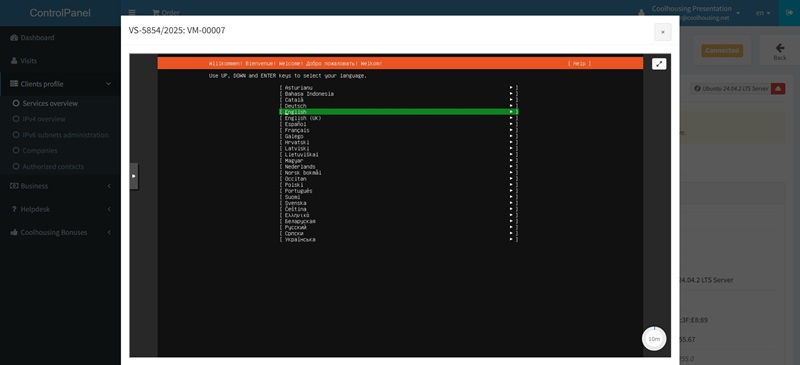
From here, you can perform the installation according to your own preferences and requirements.

